Optimize Your Code
Learn how to apply Weco to your own code. Write an evaluation script, configure the CLI, and run AI-powered optimizations on any codebase.
Now that you've seen Weco in action with an example project, let's apply it to your own code.
The key to using Weco is having two things:
- What to optimize: a single code file that you want to improve (e.g., a function, module, or script)
- Goal of optimization: an evaluation script that measures and prints the performance of your code (e.g.,
speedup: 2.5x)
Select code to optimize
What can be optimized?
Weco can optimize single code files in any programming language (e.g., a GPU kernel, an ML model, a prompt, etc.).
For example, the following code is what we optimized in the Hello, World! tutorial:
# File: module.py

import torch
import torch.nn as nn

class Model(nn.Module):
    """
    Model that performs a matrix multiplication, division, summation, and scaling.
    """

    def __init__(self, input_size, hidden_size, scaling_factor):
        super(Model, self).__init__()
        self.weight = nn.Parameter(torch.randn(hidden_size, input_size))
        self.scaling_factor = scaling_factor

    def forward(self, x):
        """
        Args:
            x (torch.Tensor): Input tensor of shape (batch_size, input_size).
        Returns:
            torch.Tensor: Output tensor of shape (batch_size, hidden_size).
        """
        x = torch.matmul(x, self.weight.T)
        x = x / 2
        x = torch.sum(x, dim=1, keepdim=True)
        x = x * self.scaling_factor
return xDefine the goal of the optimization
You need to have an evaluation script that:
- Evaluates the code you picked in Step 1 with a quantitative metric
- Prints the metric name and value to console output (like
speedup: 2.5x) so that Weco can read it
For example, the following evaluation snippet is what we used in the previous tutorial (see the complete code here):
# File: evaluate.py

# Load the baseline model and the optimized model...
# Prepare test data...

# Evaluate performance
baseline_time = benchmark(baseline_model, test_inputs)
optimized_time = benchmark(optimized_model, test_inputs)
speedup = baseline_time / optimized_time

# Print the metric for Weco to read
print(f"speedup: {speedup}")Pro tip: Check out our guide on Writing Good Evaluation Scripts to get better optimization results.
Run Weco on your code
Now you can run Weco to optimize your code:
weco run --source <path-to-your-code-to-optimize> \
     --eval-command <command-to-run-the-evaluation-script> \
     --metric <metric-name> \
     --goal <maximize/minimize> \
     --steps <number-of-optimization-iterations> \
     --additional-instructions <additional-instructions-for-the-LLM-to-follow>
weco run --source <path-to-your-code-to-optimize> ^
--eval-command <command-to-run-the-evaluation-script> ^
--metric <metric-name> ^
--goal <maximize/minimize> ^
--steps <number-of-optimization-iterations> ^
--additional-instructions <additional-instructions-for-the-LLM-to-follow>weco run --source <path-to-your-code-to-optimize> `
--eval-command <command-to-run-the-evaluation-script> `
--metric <metric-name> `
--goal <maximize/minimize> `
--steps <number-of-optimization-iterations> `
--additional-instructions <additional-instructions-for-the-LLM-to-follow>Weco will iteratively optimize the code file specified by --source, and at each iteration it will:
- Generate a new version of the code and write it to the file.
- Run the evaluation script specified by
--eval-commandto evaluate the performance of the optimized code. - Check if the evaluation metric specified by
--metrichas improved, and propose further improvements.
After all iterations (specified by --steps) are complete, the final code file (module.py in this example) will be the best performing version of the code.
For full reference on the CLI commands and options, see the CLI Reference.
We highly recommend you to check the optimized code carefully before deploying it to production.
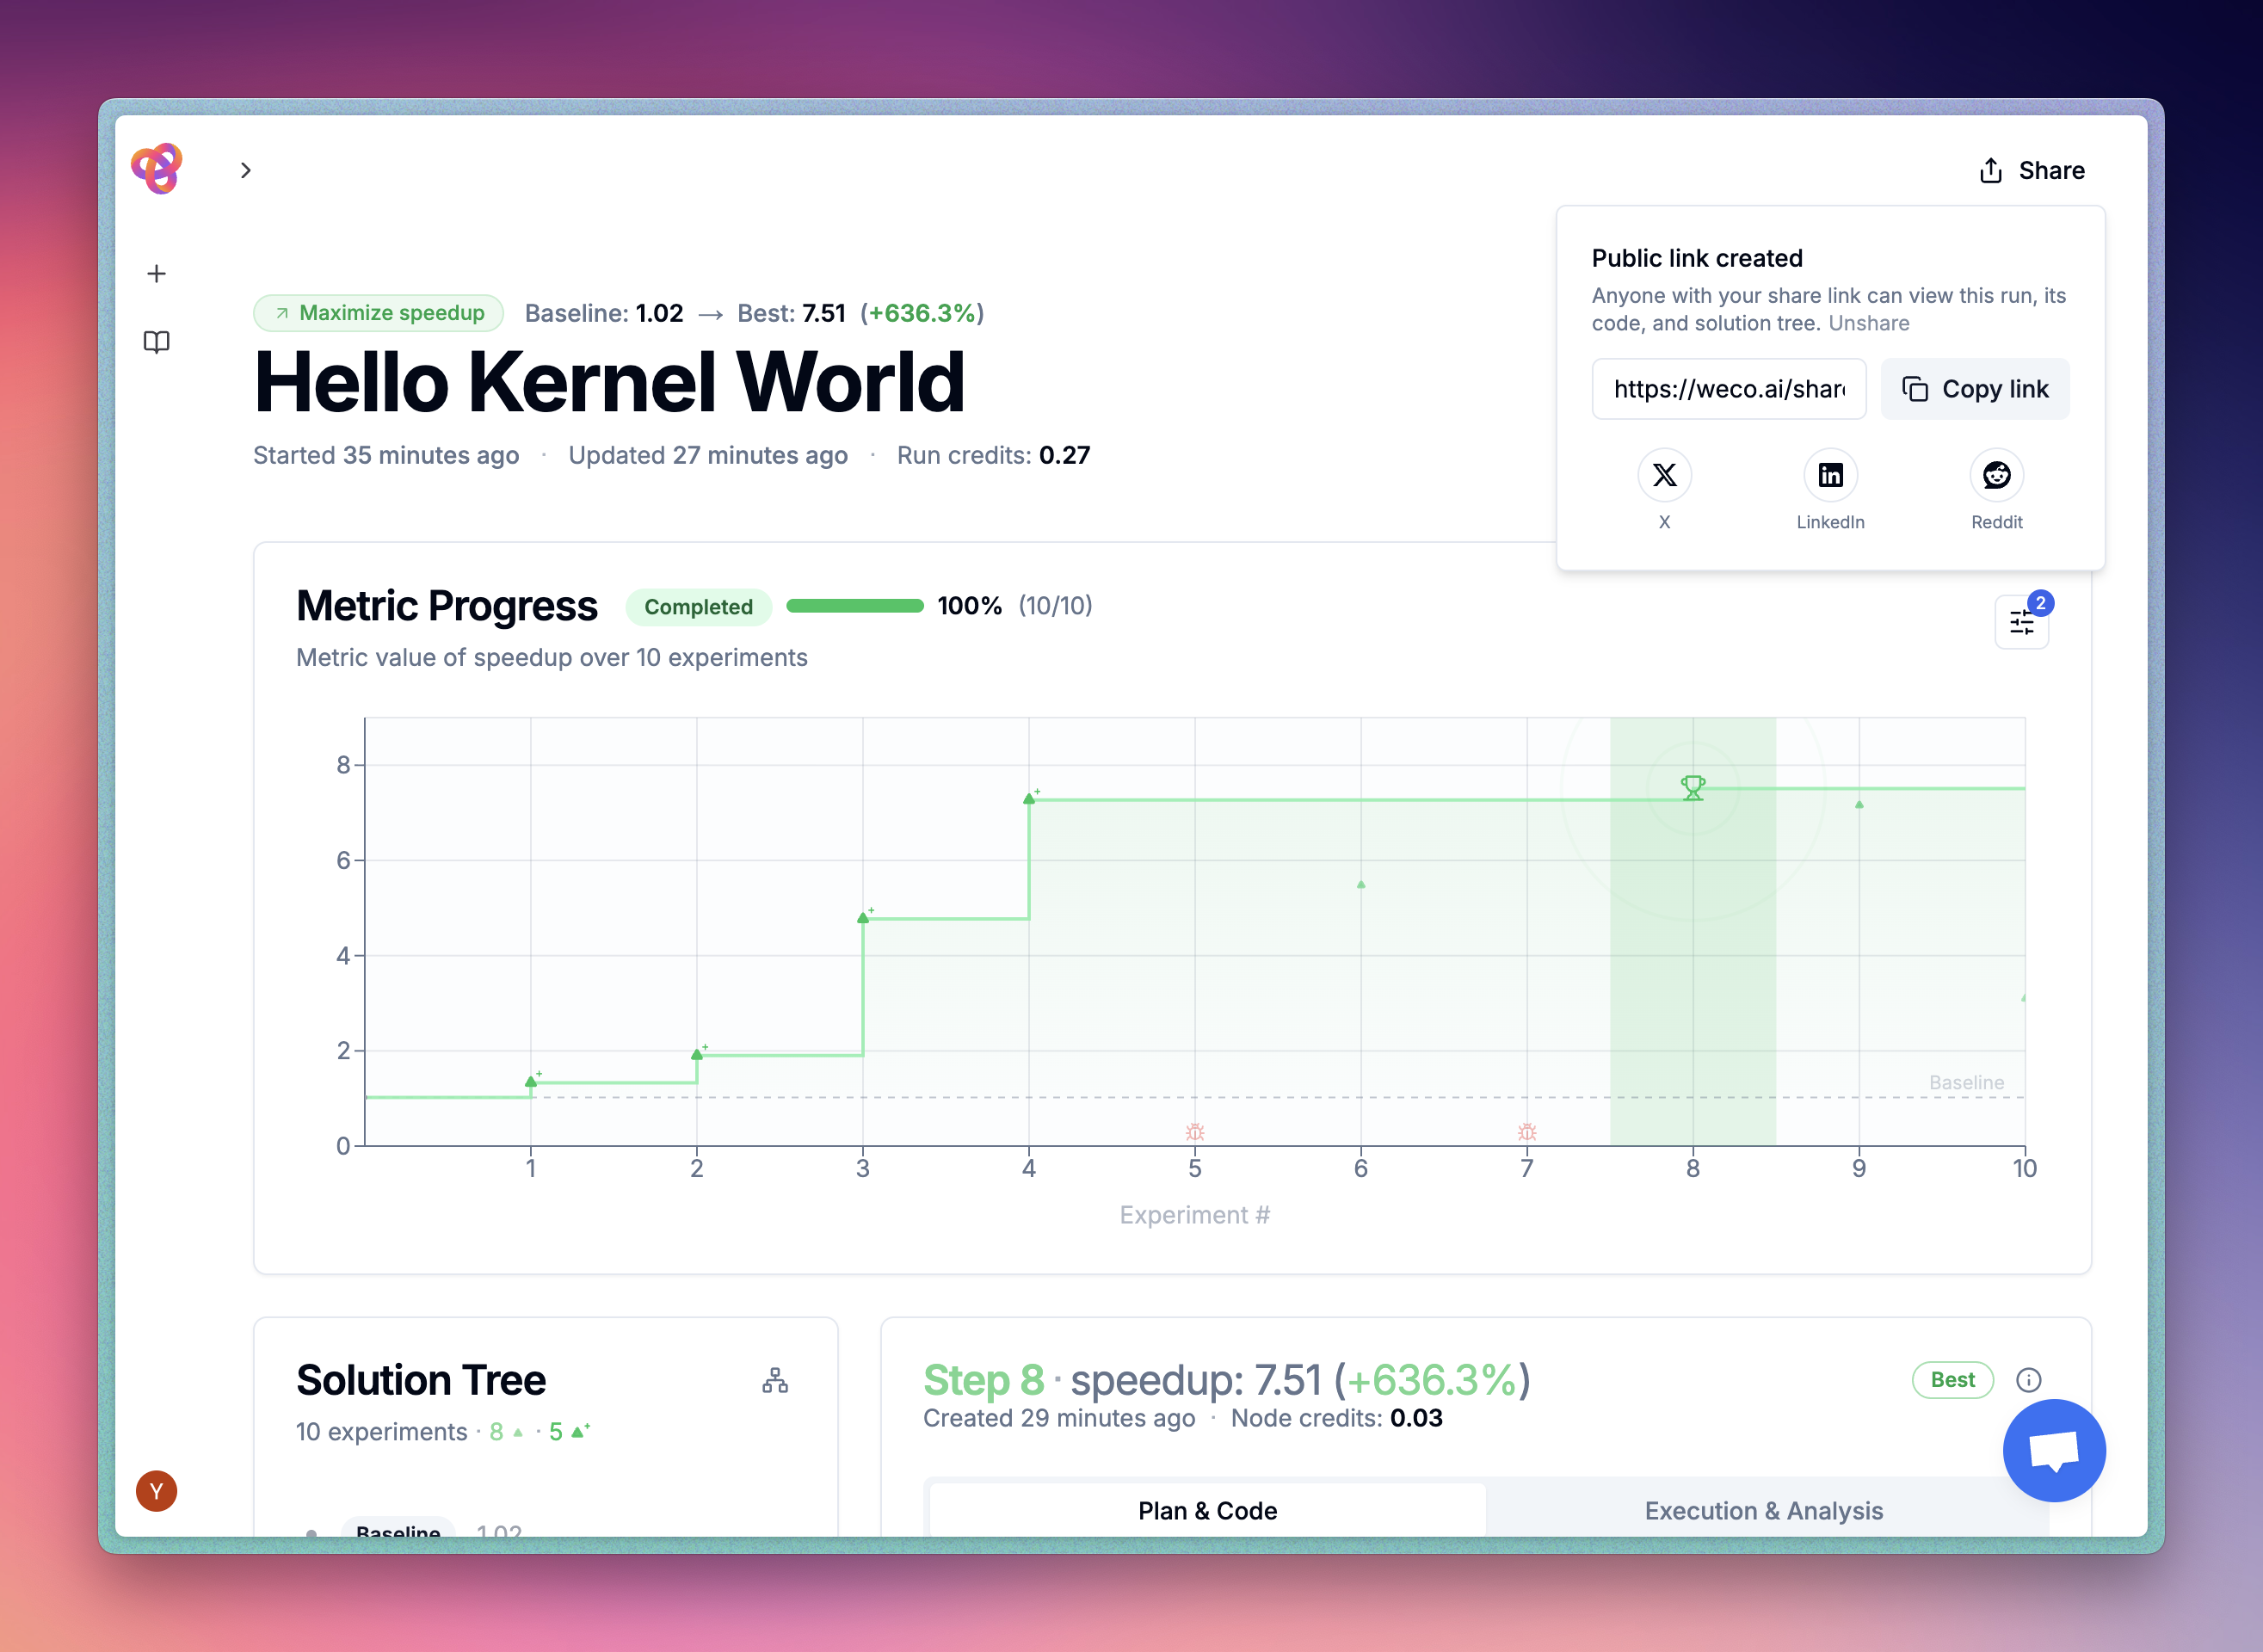
Inspect and share the optimization results
Beside seeing the optimization status in the CLI, you can also inspect the optimization process in the dashboard. You can see the optimization process in real-time, and share the results with your team.
What's next?
Now that you have run your own optimization, you can explore more ways to use Weco:
- Example Dashboard Runs - See real optimization runs in the dashboard with impressive results
- Local Examples - See Weco optimize CUDA kernels, ML models, and more
- Writing Good Evaluation Scripts - Get better results with well-designed benchmarks
- CLI Reference - Master all Weco commands and options
- FAQ - Find answers to common questions
Use a skill instead
If you're using an AI coding assistant, you can set up the Weco skill and let your assistant handle the configuration for you:
weco setup claude-code   # for Claude Code
weco setup cursor        # for Cursor
Then just tell your assistant what you want to optimize and it will figure out the right evaluation command, metric, and settings.
Getting help
Hello, World!
Get started with Weco in 5 minutes. Install the CLI, run your first code optimization, and see AI-driven improvements in real time.
Skills
Use Weco as a skill for AI coding assistants like Claude Code and Cursor. Describe what you want to optimize in plain language and your assistant handles the rest.